Pages

Saturday, September 29, 2012

Stuffed Pork Tenderloin


Last weekend we had my parents over for dinner and I decided to make the same tenderloin that I made last New Years Eve. I wanted to do a few things differently this time around and I have to admit it was even better than the last time. I followed this recipe and used dates, blue cheese and chopped pecans for the stuffing but I wanted to try searing the tenderloin before baking it in the oven. However, after I stuffed the tenderloin and sealed it with the toothpicks I began to chicken out. It seemed like a lot more trouble to sear the meat than it was worth and I did not want to lose all of the goodness inside.
My dad encouraged me to continue with my original plan and I am so glad he did. (Thanks Dad!) The meat was absolutely perfect and everyone loved it. It wasn't nearly as hard as I thought it would be to keep all the stuffing inside and I highly recommend adding this step to the cooking process.  Trust me it will be worth it.

Stuffed Pork Tenderloin

Directions:
- Butterfly the pork tenderloin by slicing the meat down the side and form a pocket for the stuffing.
- Add the chopped dates, pecans and blue cheese (eyeball it)
- Fold the meat back over to close in the blue cheese mixture and seal with toothpicks
- We used Lava salt that we brought back from our trip to Hawaii but you can use sea salt as well to sprinkle on the outside of the tenderloin
- Pour olive oil in a cast iron skillet and allow the pan to become hot. Add the meat and sear on each side until a brown crust forms (2- 3 minutes per side)


Monday, September 17, 2012

Cheesy Stuffed Shells with Meat and Spinach

 There are several meals that my mother makes where I am immediately reminded of her and the comforts of home and this is one of them. She has been making these stuffed shells for as long as I can remember. This dish is a favorite among my entire family and it has become tradition to serve it our first night of our annual beach trip.  These stuffed shells can easily be frozen making it a wonderful dinner to take to a friend who has had a baby or for a loved one who is sick. 

My mom normally uses ground turkey when making these but I chose to use ground chicken, which worked really well mixed with the other ingredients. Either way they are both a healthy alternative so choose the one you and your family prefer. These cheesy shells have been lightened up so that you and your family can still enjoy this famous Italian dish but without the guilt.  


Cheesy Stuffed Shells with Meat and Spinach

Ingredients:
- 1 lb of ground chicken or turkey
- 2- 10oz boxes frozen spinach
- 1 egg
- 1- 24 oz. container low fat cottage cheese
- 3/4 cups chopped onion
- 1 cup 2% shredded mozzarella cheese
- 1/2 cup grated Parmesan cheese
- 1 jar of your favorite marinara sauce (I used Ragu)
- 1 Box jumbo shells
- 1 teaspoon garlic salt
- salt and pepper

Directions:
- Cook the shells in boiling water till tender (about 8-10 minutes)
- While noodles are cooking add olive oil to a large skillet and saute the onions. Add in the ground meat and continue to saute until the meat is cooked through.
- In a large mixing bowl add the cooked ground meat, spinach, egg, cottage cheese, mozzarella, Parmesan, garlic salt, salt and pepper. Mix together
- Drain noodles and allow to cool

- Begin stuffing the shells with the meat and cheese mixture
- In a baking dish (you may need two) cover the bottom with some of the marinara sauce. Place the stuffed shells in the dish with the seam side up. Pour 1 to 1 1/2 cups of marinara sauce over the shells and bake on 350 degrees for 30 minutes.

*** If you are not baking the shells immediately after preparing them or if they have been frozen beforehand wait to pour the marinara sauce until ready to bake.***


Wednesday, September 12, 2012

Apple Cake

Like I mentioned in my previous post we have an abundance of apples that I am trying to use up before they go bad. I came across this recipe for an Apple Cake that we acquired from Jason's mom so I knew immediately I needed to give it a try. We still have so many recipes of Phyllis' and I feel like I have only tried a handful of them so I am always excited to test out a new one. I used half whole wheat flour with the all purpose but if you want to stick to the original recipe just use 2 1/2 cups of the all purpose flour. The recipe calls for a tube pan but since I have not yet invested in one I used a bundt pan instead. You could probably make this in a shoe box and it would still taste amazing, although that is not my recommendation.


Apple Cake

Ingredients:
- 3 cups chopped apples
- 1 1/2 cups of vegetable oil
- 2 cups of sugar
- 3 eggs
- 1 1/4 cups whole wheat flour
- 1 1/4 cups all purpose flour
- 1 teaspoon salt
- 1 teaspoon baking soda
- 2 teaspoons baking powder
- 1 teaspoon vanilla
- 1 cup chopped pecans (optional)

Directions:
- Pour oil in a large mixing bowl. Add sugar and eggs and mix well.
- Gradually add flour, salt, baking soda, and baking powder to the bowl. Add in the vanilla
- Fold in the apples
- Pour the mixture into a greased pan and bake on 350 degrees for 55 to 60 minutes.

Glaze
- 1 1/2 cups of powdered sugar
- 3 tablespoons water
- 2 teaspoons vanilla

Mix ingredients together and pour over top of cake after it cools


Sunday, September 9, 2012

Apple Muffins

I know that fall doesn't technically start for another few weeks but now that Labor Day has passed, kids are back in school, and football has started it is fall in my book. As much as I love the summer I am finding myself very excited for cooler temperatures, changing of the leaves, pumpkins and of course fresh apples. While we were in the mountains last weekend we stopped to buy a bag of Honey Crisp apples (my favorite) before coming back home. With the addition of the apples that we already had on hand you could say we had more than enough apples to enjoy. I have been busy this week trying to find different uses for them.


I found this recipe off of the Smitten Kitchen website for Apple Muffins that were both healthy and delicious. The only change I made from the original recipe was reducing the sugar by about 1/4 of a cup. With the addition of the apples it still had the perfect amount of sweetness. If you find yourself with an abundance of apples this fall or you simply want a healthy breakfast or snack option then I encourage you to give these muffins a try.


Wednesday, September 5, 2012

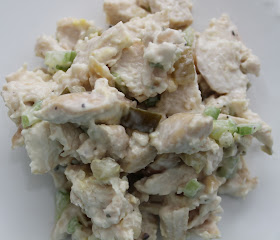
Jason's Chicken Salad

To switch things up my sweet husband has agreed to write a post about his mom's famous chicken salad, recipe included, which is often tweaked to recreate the original. After lots of practice and playing around with measurements I think his recipe is equally as good.

We all have a special dish that reminds us of our childhood.  For me, it’s mom’s chicken salad which was a staple around our house and the center piece at her restaurant, Chantilly’s.  To be 100% honest though, the story of mom’s chicken salad begins with her mother, Inez, or as the family knew her …. Mimi. 
Mimi grew up in Johnston County, Pine Level, among a family of farmers where hard work and faith was a part of each day.  Either by necessity, skill or both……. Mimi became a great cook.   It was a guarantee when we visited that Mimi would have a freshly baked German chocolate cake, a huge pot of vegetable soup, fresh vegetables from the garden, frozen blueberries which were a favorite treat and last but not least ……. chicken salad.  The chicken salad was great for dinner (lunch to you city folk), supper or anytime in between …... served on bread (white bread only), crackers or by itself. 
Mom would talk about trial and error in the kitchen but would also evolve into a great cook and carried on the tradition of Mimi’s chicken salad with the opening of Chantilly’s.  Chantilly’s was inspired by a dream and sustained by her determination but its existence can be credited to many.  My brother (Dr. of Wood and Master of All) for transforming a consignment shop into a restaurant, my sister (the only one who actually had any restaurant experience) for shaping the business and friends who served as restaurant staff and made all the hard work fun.  The chicken salad at Chantilly’s was featured the following ways…… scoop with accompanying fruit and pasta salad, part of a sampler dish, chicken salad melt, the sandwich or a scoop on a garden salad.
Mom always said that she couldn’t make it as good as Mimi and I say the same thing about hers today.          
Jason's Chicken Salad
Ingredients:
- 3 chicken breast
- 2 tablespoons red or green pepper, chopped
- 1/3 cup diced celery
- 2 -3 tablespoons sweet relish
- 3 tablespoons light ranch dressing- Naturally Fresh is recommended
- 3 tablespoons light mayonnaise
- 1/2 teaspoon sugar
- salt and pepper to taste

Directions:
- Sprinkle the chicken with olive oil, salt and pepper and bake in the oven on 350 for 20-25 minutes, or cooked through
- Finely chop or shred the chicken
- In a mixing bowl add the chicken with all of the ingredients
- Mix together (Clean hands work perfectly here) all of the ingredients.


Tuesday, September 4, 2012

Labor Day Weekend and Sock-It-To-Me Cake

I hope you all had a wonderful Labor Day Weekend. Jason and I spent it in the mountains with my parents and some close family friends. It was a relaxing weekend and the perfect place to be to welcome the new season.


Saturday morning we went to the Farmers Market in Boone to pick up some fresh produce for the weekend. Not only did we pick up some stuff for the weekend but we bought a few things to enjoy at home. My friend had told me about the Ravioli made by the Pasta Wench so we picked up a bag of the Butternut Squash and Garlic Pear that we ended up cooking last night when we got home. Holy Yum! The best Ravioli I have ever had. I am trying to figure out how to have this shipped to my door without having to make a weekly trip to Boone's Farmers Market. My hot sauce loving husband also picked up some of this sauce to bring back home with us.
The remainder of our weekend was spent hiking, shopping, cornhole, reading and eating lots of good food.


Friday morning before we left I made a Sock-It-To-Me Cake to take to the mountains with us. When I first saw the name I thought it was something silly that Phyllis and her girlfriends came up with at the Tea Room but come to find out this is an actual cake. Who knew?
This is the perfect cake to accompany your morning coffee or to enjoy for dessert. This super moist cake has a cinnamon, brown sugar, and pecan filling and is easy to put together. I chose to bake this in a bundt pan but you can just as easily use a tube pan.


In addition to the sock it to me cake I also made Bran Muffins for people to enjoy throughout the weekend and my Corn Chowder with Sausage soup Saturday for lunch. They were both a hit.

Sock-It-To-Me Cake


Ingredients:
- 1 box Butter Golden cake mix (Duncan Hines)
- 1 cup sour cream
- 3/4 cup vegetable oil
- 1/2 cup sugar
- 1 teaspoon vanilla
- 4 eggs
Filling:
- 3 tablespoons brown sugar
- 1 teaspoon cinnamon
- 1 cup chopped pecans

Directions:
- Combine the top ingredients (cake mix through eggs) in a large mixing bowl. In a smaller bowl mix together the filling ingredients.
 
Pour 2/3 of the cake mix into a greased bundt pan. Pour the cinnamon filling over top. Pour the remaining cake mixture over top. 


Bake on 375 degrees for 50 to 55 minutes.